Archive for January, 2019
January 30, 2019
Bob Perkins collected and reared a Shadow Darner dragonfly (Aeshna umbrosa) larva/nymph. This blog post features two focus-stacked composite images of a beautifully preserved specimen of the adult that emerged from the larva.
Each composite image was created from 30 TIF files extracted from a one-second MP4 video of the subject, “photographed” using my new Panasonic Lumix DMC-FZ300 digital camera set for “Post Focus.”
This individual is a male, as indicated by his terminal appendages and “indented” hind wings (shown above). All male dragonflies have three terminal appendages, collectively called “claspers”: the two cerci are missing (they broke off the terminal end of the abdomen during shipping); the epiproct is intact.
Takeaways
Perhaps the biggest takeaway from on-going experimentation with Panasonic “Post Focus” is that the process continues to impress — it works quickly (typically one second or so) and works well, using lightweight, inexpensive equipment for making composite images of acceptable quality.
What’s not to like? The obvious answer: The image quality isn’t as high as comparable images created using HEAVY and EXPENSIVE camera gear in the controlled environment of a photo studio. On the other hand, I know from experience I’m unlikely to lug all of that gear into the field. I call it a BIG WIN to have found a relatively lightweight, inexpensive camera kit that does essentially the same job almost as well!
The next test: Use adult dragonflies in the wild as the subject. Regrettably, that will have to wait until the first odonates begin emerging during early spring.
Related Resources
Tech Tips
The following equipment was used to shoot the “photos” for creation of the composite images, shown above: Panasonic Lumix DMC-FZ300 digital camera set for “Post Focus“; and two Sunpak LED-160 Video Lights.
Adobe Photoshop CC 2017 was used to create the preceding focus-stacked composite images, as well as spot-heal and sharpen the final output.
Copyright © 2019 Walter Sanford. All rights reserved.
Tags:Aeshna umbrosa, cerci, claspers, epiproct, focus stacking, gear talk, male, Panasonic "Post Focus", Shadow Darner dragonfly, studio photography, terminal appendages
Posted in Aperture, digital photography, digital videography, dragonflies, How To, natural science, Panasonic DMC-FZ300, Photoshop, Sunpak LED-160, wildlife photography | 2 Comments »
January 28, 2019
A toy dragonfly was “photographed” at BoG Photo Studio using my new Panasonic Lumix DMC-FZ300 digital camera set for “Post Focus.” Two Sunpak LED-160 Video Lights were used to light the scene. 30 individual frames were extracted from the resulting MP4 video, and saved as TIF files; Adobe Photoshop was used to create the following focus-stacked composite image.

A plastic toy dragonfly.
The test shots featured in my last blog post, and this one, were taken in order to establish the proof of concept that Panasonic “Post Focus” can be used to quickly (well, everything is relative) create high quality focus-stacked composite images. After limited testing, I can say the process works fairly well.
The next test: Use a preserved specimen of a real adult dragonfly as the subject. Please stay tuned for my next blog post.
Copyright © 2019 Walter Sanford. All rights reserved.
Tags:focus stacking, gear talk, Panasonic "Post Focus", studio photography
Posted in Aperture, digital photography, digital videography, dragonflies, How To, Panasonic DMC-FZ300, Photoshop, product reviews, Sunpak LED-160 | 2 Comments »
January 25, 2019
My new Panasonic Lumix DMC-FZ300 features some significant upgrades over my DMC-FZ150 such as a touch-screen LCD, built-in WiFi (enabling remote control of the camera using the “Panasonic Image App“), 49 focus points, and 4K video, to name a few. Perhaps the most intriguing new feature is what Panasonic calls “Post Focus.”
“Post Focus” can be used to change the focus point after a photograph is taken, in camera. OK, that’s astounding! But wait, there’s more.
With “Post Focus” enabled, the camera is used in the same way as when you’re shooting still photos. In reality, the camera records a small movie clip in 4K video at 30 fps (4:3 aspect ratio) every time you press the shutter button.
The 4K movie recording function is used to record roughly one second of MP4 video at 30 frames/second. During this recording, the camera’s autofocusing system scans the lens around the subject, moving from the foreground to the background to cover the entire scene. … It’s like a sophisticated form of focus bracketing and produces a movie clip containing about 30 frames. Source Credit: How the Panasonic Post Focus function works.
One reviewer of photography gear opined the process is too slow to be useful in real-world situations; in contrast, my first impression is the process works surprisingly quickly.
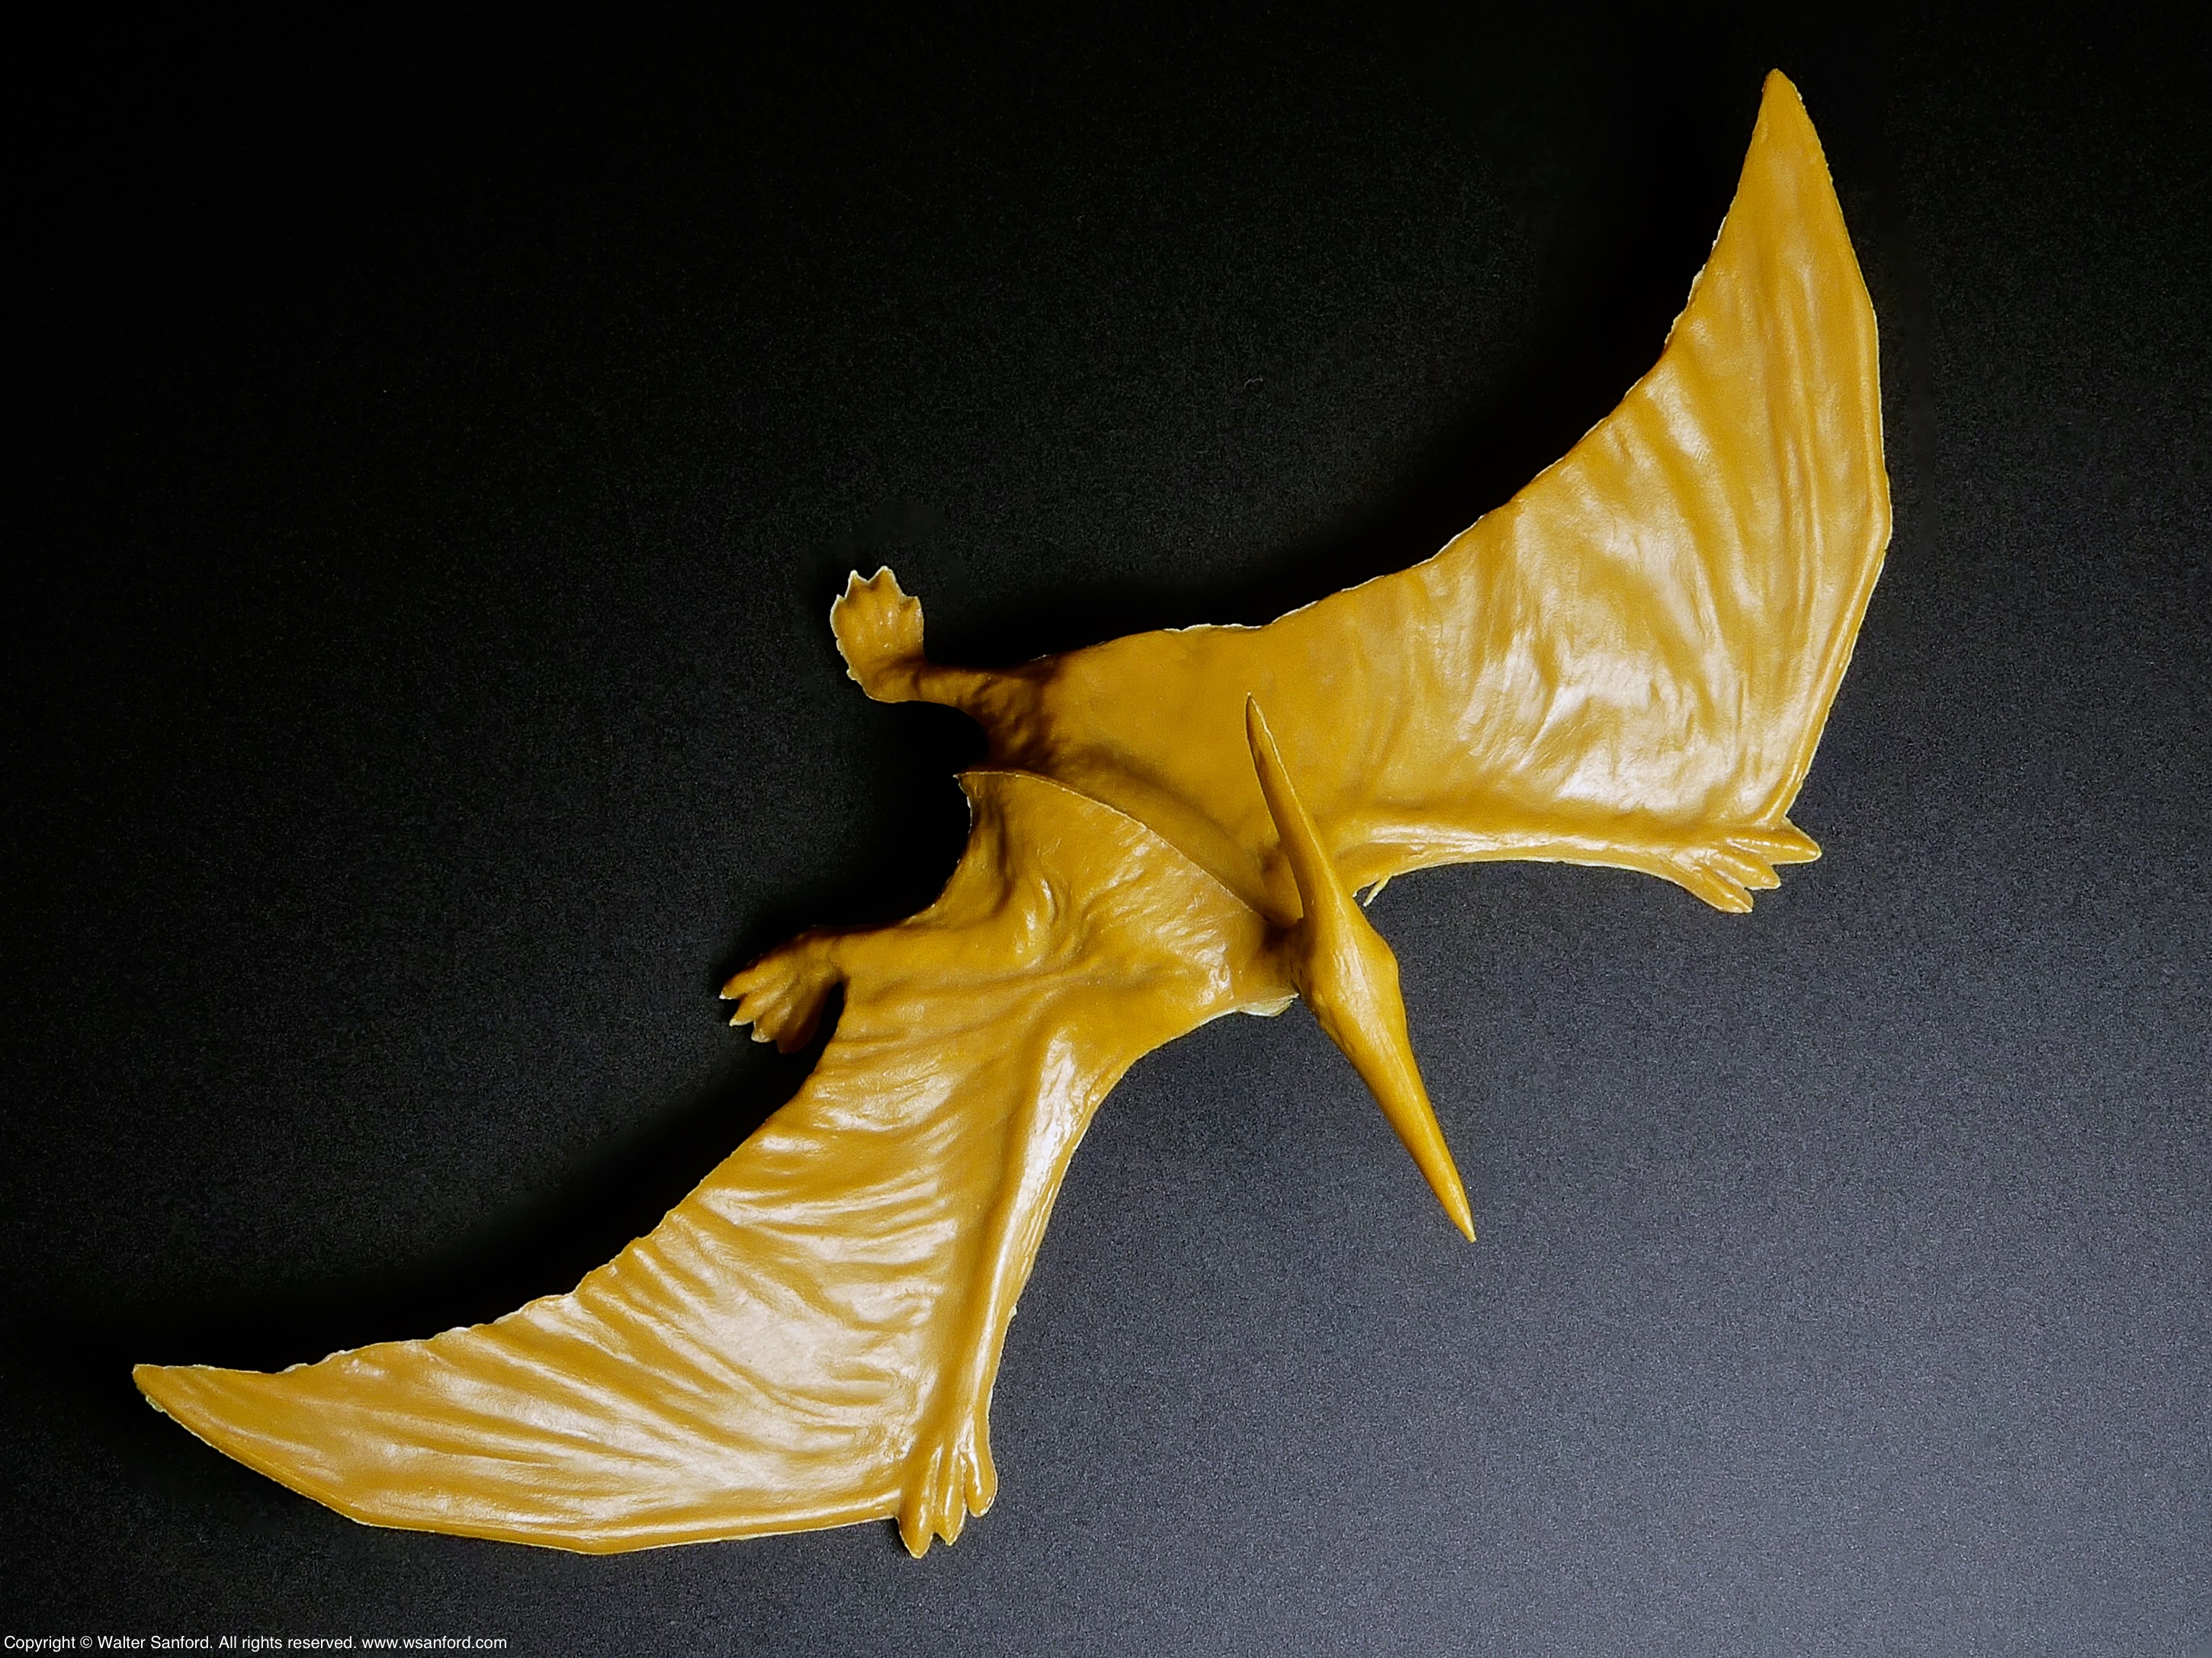
An MP4 file can be opened in Adobe Photoshop in order to export individual frames from the 4K video clip; the files can be saved in either JPG or TIF format. In turn those files can be imported into Photoshop to create a focus-stacked composite image, such as the one shown below.
A toy Pterodactyl was “photographed” at BoG Photo Studio using Panasonic “Post Focus.” One Sunpak LED-160 Video Light was used to light the scene. 30 individual frames were extracted from the resulting MP4 video, and saved as TIF files; Adobe Photoshop was used to create the preceding focus-stacked composite image.
I think Panasonic “Post Focus” shows great potential for enabling the production of high quality focus-stacked composite images when photowalking, without carrying a lot of photography gear into the field.
Related Resources
Copyright © 2019 Walter Sanford. All rights reserved.
Tags:focus stacking, gear talk, Panasonic "Post Focus", studio photography
Posted in Aperture, digital photography, digital videography, How To, Panasonic DMC-FZ300, Photoshop, photowalking, product reviews, Sunpak LED-160 | 3 Comments »
January 23, 2019
A toy dragonfly was photographed at BoG Photo Studio using a new superzoom bridge camera.

15mm (84.3mm, 35mm equivalent) | ISO 100 | f/2.8 | 1/2000 s | 0 ev
The Backstory
I bought a Panasonic Lumix DMC-FZ300 superzoom bridge camera recently — the successor to my Panasonic Lumix DMC-FZ150 (my go-to camera kit for photowalking). The DMC-FZ150 still works, but it is closer to the end of its useful life than the beginning.
After limited testing, I’ll say this: Although the DMC-FZ300 is essentially the same camera as the DMC-FZ150 with some significant upgrades, it’s going to be a while until I feel as comfortable using the 300 as I do with the 150. Let’s just say I’ve spent a lot of quality time with the owners manual!
Copyright © 2019 Walter Sanford. All rights reserved.
Tags:gear talk, studio photography
Posted in Aperture, Canon 580EX Speedlite, digital photography, dragonflies, Panasonic DMC-FZ300 | Leave a Comment »
January 21, 2019
The following photograph shows the wooden side of a dragonfly rubber stamp.

The Backstory
On 26 December 2017, I published a blog post entitled “What is it?” I was testing my new Fujinon XF80mm macro lens used in combination with a Fujifilm MCEX-11 extension tube and needed a small subject to photograph. I was also testing my new Canon MT-26EX-RT Macro Twin Lite used in manual mode with my Fujifilm X-T1 digital camera.
In this case, I was testing — actually retesting — my new Fujifilm MCEX-16 extension tube. The last time I tested the 16mm extension tube, I used it in combination with an 11mm extension tube. Bottom line, I wasn’t happy with the results. So I decided to test the 16mm tube by itself, decrease the f-stop to a value closer to the sweet spot of the lens, and increase the exposure. Much better!
Related Resources
Tech Tips
The following equipment was used to shoot the preceding photo: Fujifilm X-T1 digital camera; Fujifilm MCEX-16 extension tube; Fujinon XF80mm macro lens; Godox XProF TTL Wireless Flash Trigger for Fujifilm cameras; Godox TT685F Thinklite TTL Flash for Fujifilm Cameras; Godox TT685C Thinklite TTL Flash for Canon Cameras fitted with a Lastolite Ezybox Speed-Lite 2 flash modifier; and a Canon 580EX II Speedlite mounted on a Godox X1R-C TTL Wireless Flash Trigger Receiver for Canon.
Adobe Photoshop CC 2017 was used to spot-heal and sharpen the final output.
Copyright © 2019 Walter Sanford. All rights reserved.
Tags:gear talk, studio photography
Posted in Aperture, Canon 580EX II Speedlite, digital photography, dragonflies, extension tubes, Fujifilm X-T1, Fujinon XF80mm macro lens, Godox TT685C, Godox TT685F, Godox X1R-C, Godox XProF, How To, Lastolite flash modifier, macro photography, Photoshop | Leave a Comment »
January 18, 2019
Like Tim “The Tool Man” Taylor, I like/need more power. (Grunt, grunt.) Regular readers of my photo blog know that I have purchased several new external flash units and related accessories, all of which use batteries as their power source.
Panasonic eneloop pro rechargeable batteries and Ansmann Battery Boxes are my current favorite brands.

Panasonic eneloop pro rechargeable batteries | Ansmann Battery Box
Look closely at the full-size version of the preceding photo. Notice that the month and year I bought the batteries is written on the side of each battery using a Sanford’s Sharpie permanent marker. I do this for two reasons. First, it’s easier to group/use batteries of the same vintage. Second, it’s easier know when it’s time to replace a set of batteries that doesn’t hold a charge as long as it used to.
The little things matter in photography. Little things like batteries, especially when you’re photowalking in the field. I always carry at least two boxes of four batteries per box.
Copyright © 2019 Walter Sanford. All rights reserved.
Tags:gear talk, Lastolite Ezybox Speed-lite 2 flash modifier, studio photography
Posted in Aperture, digital photography, extension tubes, Fujifilm X-T1, Fujinon XF80mm macro lens, Godox TT685F, Godox XProF, Lastolite flash modifier, photowalking, product reviews | Leave a Comment »
January 16, 2019
As promised, this blog post features more test shots of the exuvia from a Blue Corporal dragonfly (Ladona deplanata) larva/nymph collected and reared by Bob Perkins.
All of the images in this photo set (including the dorsal view featured in my last blog post) are underexposed, except for the following photo: this photo looked overexposed on my camera LCD; the rest of the photos looked fine.
In reality, the photos were underexposed because I didn’t compensate for the effect of the extension tubes on exposure — a problem that was probably caused/exacerbated by switching the ISO from my usual setting of “A” (Auto) to 200. This photo turned out to have the best exposure because the flash power was several stops higher than the rest of the photos in the set. Remember the exposure triangle. (See Tech Tips/Related Resources, below.)
Oh, so close to a good shot! The left front leg blocks part of the face-head, and that doesn’t work for me. This specimen is a good candidate for rehydrating the exuvia and reposing its legs.
Related Resource: Test shot: Ladona deplanata exuvia.
Tech Tips
The following equipment was used to shoot the preceding photo: Fujifilm X-T1 digital camera; Fujifilm MCEX-11 and MCEX-16 extension tubes; Fujinon XF80mm macro lens; Godox XProF TTL Wireless Flash Trigger for Fujifilm cameras; Godox TT685F Thinklite TTL Flash for Fujifilm Cameras; Godox TT685C Thinklite TTL Flash for Canon Cameras fitted with a Lastolite Ezybox Speed-Lite 2 flash modifier; and Canon 580EX II Speedlite mounted on a Godox X1R-C TTL Wireless Flash Trigger Receiver for Canon.
Adobe Photoshop CC 2017 was used to spot-heal and sharpen the final output.
Tech Tips/Related Resources
What you should remember, as a rule of thumb, is that by the time you get close to magnifications of 1:1, the effective f-stop of the lens will have changed by about 2 stops. That means you, or your camera, are needing to compensate for this with a higher ISO, or a shutter speed that’s 4-times longer than you’d need without those tubes.
Copyright © 2019 Walter Sanford. All rights reserved.
Tags:Blue Corporal dragonfly, exuvia, Family Libellulidae (Skimmers), gear talk, Ladona deplanata, studio photography
Posted in Aperture, Canon 580EX II Speedlite, digital photography, dragonflies, extension tubes, Fujifilm X-T1, Fujinon XF80mm macro lens, Godox TT685C, Godox TT685F, Godox X1R-C, Godox XProF, How To, Lastolite flash modifier, macro photography, natural science, Photoshop, wildlife photography | 2 Comments »
January 14, 2019
Bob Perkins collected and reared a Blue Corporal dragonfly (Ladona deplanata) larva/nymph. This is the exuvia from the nymph.
I took a series of test shots with the specimen in four poses: dorsal; dorsal-lateral; face-head; and lateral. The following photo is the dorsal view; other poses will be featured in one-or-more follow-up blog posts.
I was also testing two new pieces of photography gear: a Fujifilm 16mm extension tube; and a Godox X1R-C TTL Wireless Flash Trigger Receiver for Canon external flash units.
For more magnification, I combined my Fujinon XF80mm macro lens with Fujinon MCEX-11 and MCEX-16 extension tubes.
My Canon 580EX II Speedlite features two wireless modes: optical master and optical slave; it does not feature wireless radio master/slave modes. Having said that, if the Canon 580EX II external flash is mounted on a Godox X1R-C, then the Canon flash can be triggered by wireless radio using a Godox XPro-series flash trigger.
For example, I mounted a Godox XProF TTL Wireless Flash Trigger for Fujifilm cameras on my Fujifilm X-T1 digital camera. During limited testing, I discovered both my Canon 580EX- and 580EX II Speedlites fire when mounted on an X1R-C, with the following caveats: the flashes are set for Manual Mode only, at shutter speeds less than or equal to 180s (the sync speed of the XT-1 camera); neither TTL nor HSS works.
Related Resource: More test shots: Ladona deplanata exuvia.
Tech Tips
The following equipment was used to shoot the preceding photo: Fujifilm X-T1 digital camera; Fujifilm MCEX-11 and MCEX-16 extension tubes; Fujinon XF80mm macro lens; Godox XProF TTL Wireless Flash Trigger for Fujifilm cameras; Godox TT685F Thinklite TTL Flash for Fujifilm Cameras; Godox TT685C Thinklite TTL Flash for Canon Cameras fitted with a Lastolite Ezybox Speed-Lite 2 flash modifier; and Canon 580EX II Speedlite mounted on a Godox X1R-C TTL Wireless Flash Trigger Receiver for Canon.
Adobe Photoshop CC 2017 was used to spot-heal and sharpen the final output.
Copyright © 2019 Walter Sanford. All rights reserved.
Tags:Blue Corporal dragonfly, Family Libellulidae (Skimmers), gear talk, Ladona deplanata, studio photography
Posted in Aperture, Canon 580EX II Speedlite, digital photography, dragonflies, extension tubes, Fujifilm X-T1, Fujinon XF80mm macro lens, Godox TT685C, Godox TT685F, Godox X1R-C, Godox XProF, How To, Lastolite flash modifier, macro photography, natural science, Photoshop, wildlife photography | 2 Comments »
January 11, 2019
Bob Perkins collected and reared a Shadow Darner dragonfly (Aeshna umbrosa) larva/nymph. This blog post features a focus-stacked composite image of a beautifully preserved specimen of the adult that emerged from the larva.
This individual is a male, as indicated by his “indented” hind wings.
Artifacts
In my experience, focus stacking either works or it doesn’t. When it doesn’t work, “artifacts” appear in the final output that can be caused by many factors. There are work-arounds that can be used to repair the artifacts with mixed success. (See Tech Tips/Related Resources.)
I shot 19 photographs that were used to create a focus-stacked composite image of the Shadow Darner dragonfly. There’s a lot going on in those photos that caused too many artifacts to publish the final output. Several of the more noticeable artifacts are shown below.

Can you see three artifacts?

Artifacts highlighted.
I created another composite image; I used as many photos as I could before the first artifacts appeared. As it turns out, only five of 19 photos were used in the do-over composite image (shown at the beginning of this blog post). Look closely — some of the same artifacts are also noticeable in the do-over version.
Related Resources
Tech Tips
The following equipment was used to shoot the preceding composite image: Canon EOS 5D Mark II digital camera, in manual mode; Kenko macro automatic extension tubes (12mm, 20mm, and 36mm); Canon EF100mm f/2.8L Macro lens (set for manual focus); and Canon MT-26EX-RT Macro Twin Lite set for “Master” mode, and several external flashes set for “Slave” mode including Canon 580 EX- and Canon 580EX II Speedlites and a Godox TT685C Thinklite TTL Flash fitted with a Lastolite Ezybox Speed-Lite 2 flash modifier.
Auto power-off was disabled for the camera and all external flash units.
Adobe Photoshop CC 2017 was used to spot-heal and sharpen the final output.
Tech Tips/Related Resources
Copyright © 2019 Walter Sanford. All rights reserved.
Tags:Aeshna umbrosa, Family Aeshnidae (Darners), gear talk, high-speed sync, Shadow Darner dragonfly, studio photography
Posted in Aperture, Canon 580EX II Speedlite, Canon 580EX Speedlite, Canon EF 100mm Macro lens, Canon EOS 5D Mark II, Canon MT-26EX-RT Macro Twin Lite, digital photography, dragonflies, extension tubes, Godox TT685C, How To, Lastolite flash modifier, macro photography, natural science, Photoshop, wildlife photography | 2 Comments »
January 9, 2019
Bob Perkins collected and reared a Shadow Darner dragonfly (Aeshna umbrosa) larva/nymph. This is a preserved specimen of the adult that emerged from the larva.
Test shots of this beautiful specimen were taken using a relatively small aperture of f/16 for greater depth of field. The following photo is a “one-off,” that is, not a composite image.
Related Resource: Test shots: Aeshna umbrosa exuvia.
Tech Tips
The following equipment was used to shoot the preceding photograph: Canon EOS 5D Mark II digital camera, in manual mode; Kenko macro automatic extension tubes (12mm, 20mm, and 36mm); Canon EF100mm f/2.8L Macro lens (set for manual focus); and Canon MT-26EX-RT Macro Twin Lite set for “Master” mode, and several external flashes set for “Slave” mode including Canon 580 EX- and Canon 580EX II Speedlites and a Godox TT685C Thinklite TTL Flash fitted with a Lastolite Ezybox Speed-Lite 2 flash modifier.
Auto power-off was disabled for the camera and all external flash units.
Adobe Photoshop CC 2017 was used to spot-heal and sharpen the final output.
Copyright © 2019 Walter Sanford. All rights reserved.
Tags:Aeshna umbrosa, Family Aeshnidae (Darners), gear talk, high-speed sync, Shadow Darner dragonfly, studio photography
Posted in Aperture, Canon 580EX II Speedlite, Canon 580EX Speedlite, Canon EF 100mm Macro lens, Canon EOS 5D Mark II, Canon MT-26EX-RT Macro Twin Lite, digital photography, dragonflies, extension tubes, Godox TT685C, How To, Lastolite flash modifier, macro photography, natural science, Photoshop, wildlife photography | 1 Comment »